Have you noticed water pooling on the bathroom floor outside your shower? You might see cracked or discoloured grout lines, accompanied by a persistent musty smell that lingers despite your best cleaning efforts. Perhaps the paint on the adjacent wall is starting to bubble, or the wooden door frame near the shower is swelling from excess moisture.
It is easy to jump to the conclusion that a pipe has burst behind the wall. in many cases, water seeps through damaged grout and deteriorated silicone. A simple regrouting and resealing process can effectively stop that leak without requiring the removal of a single tile.
This comprehensive guide outlines when regrouting your shower can successfully address a leak and when it might not be sufficient. You will discover the regrouting process when you work with Leaking Showers Sealed, including how long you should avoid using the shower afterwards. If you suspect that the grout is the source of your problems, our dedicated shower regrouting page provides an in-depth overview of our services in North Richmond, the Hills District, and the North Shore.
Can Regrouting Effectively Fix My Shower Leak?
- Regrouting can successfully stop leaks when water escapes through damaged grout or silicone.
- We remove the old grout and replace it with Ardex EG15 epoxy grout, a non-porous material, while resealing corners and junctions with Ardex neutral cure silicone.
- Your tiles stay intact, allowing you to fix a leaking shower without extensive renovations or tile removal.
- If the leak originates from a faulty pipe, drain, or tap, consulting a plumber is essential. A compromised membrane beneath the tiles will require tile removal, meaning a regrout alone will not solve these issues.
- It is recommended to wait at least 24 hours before using the shower again.
Contact Leaking Showers Sealed if you have observed mouldy grout, a damp smell, or water leaking around your shower.
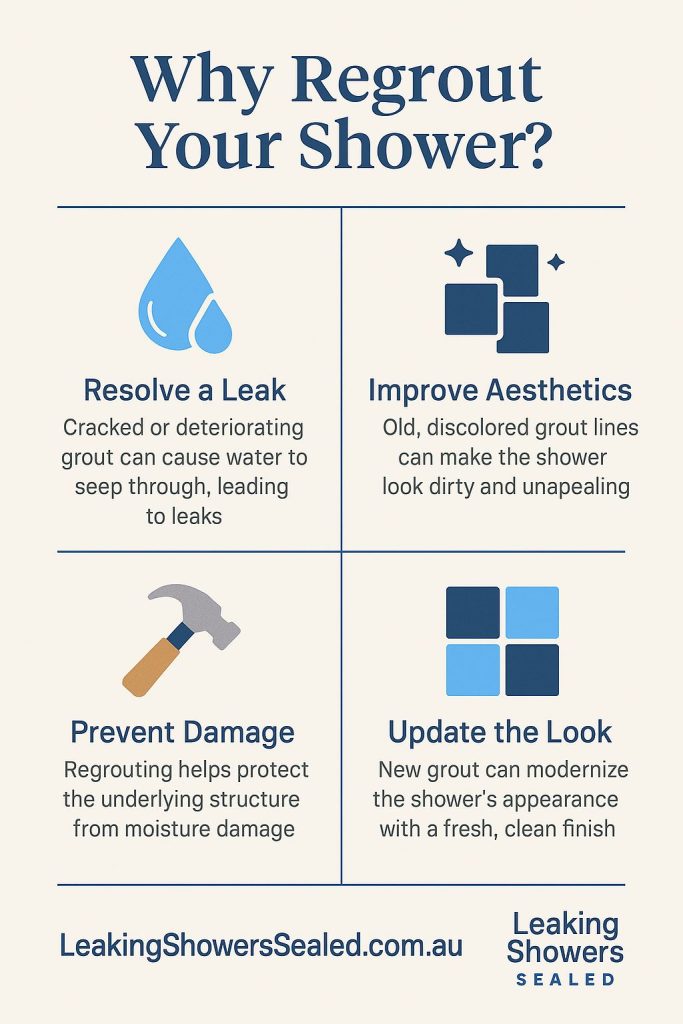
Exploring the Importance of Shower Regrouting
Shower regrouting entails removing old, cracked, or mouldy grout from between your shower tiles and applying new grout that reinstates the seal between the joints. At Leaking Showers Sealed, we use Ardex EG15 epoxy grout, which is non-porous, preventing water and mould from penetrating as traditional cement grout does.
Over time, grout deteriorates due to exposure to hot water, cleaning chemicals, and minor structural movements. This deterioration results in cracks and pinholes that allow water to seep through the joints, even when the tiles themselves appear unaffected. Often, this damage remains hidden as water accumulates behind the tiles and beneath the shower floor.
Regrouting revitalises these joints, restoring the shower’s watertight seal. It also eliminates unsightly stained grout lines that can make an otherwise clean bathroom look dated, all without the expense and disruption of a complete renovation.
Will Regrouting My Shower Resolve the Leaks?
Regrouting effectively addresses leaks when water escapes through compromised grout or silicone, common culprits of shower leaks. The initial step involves identifying the source of the water to ascertain whether regrouting is the right solution.
When Is Regrouting and Resealing the Right Solution?
Regrouting and resealing is the ideal strategy when you notice cracked, crumbling, or missing grout, or mould that reappears shortly after cleaning. It is also effective if the silicone around corners and the shower base has split or detached. In these cases, the tiles remain intact, with water leaking through the joints.
When Should You Call a Plumber Instead of Regrouting?
If the leak is stemming from a pipe within the wall, the shower drain, or a tap, regrouting will not solve the problem. We partner with plumbers, and if our inspection reveals an issue with a pipe, drain, or tap, we will provide a clear explanation and refer you to a plumber for further assistance.
What If the Waterproofing Membrane Beneath the Tiles Has Failed?
A waterproofing membrane is located behind the tiles and underneath the shower floor. Prolonged exposure to water through the grout can compromise this membrane. Replacing a failing membrane necessitates tile removal, classifying it as renovation work that we do not undertake.
Andreas, who holds NSW licence 89111C, is an expert in waterproofing. Our team is trained to identify a failed membrane. If we discover during our inspection that your shower requires more than a straightforward regrout, we will inform you before commencing any work.
Addressing the issue at the first signs of trouble helps protect the membrane. Fresh epoxy grout and new silicone create a barrier against water, making it essential to tackle cracked grout before further damage occurs.
How to Identify the Need for Shower Regrouting
Look out for the following signs that indicate your shower may be leaking through the grout and silicone:
- Cracked, loose, or missing grout between the tiles
- Mould that quickly reappears after cleaning
- Damp odours or visible moisture damage near the shower
- Water pooling outside the shower or leaking into adjacent areas
- Bubbling paint, discoloured walls, or soft floorboards
- Tiles that feel loose or sound hollow when tapped
If you observe any of these symptoms, it is likely that the grout and silicone are no longer effectively retaining water within the shower. Tiles that sound hollow when tapped, referred to as drummy tiles, may need refixing before the shower can be resealed, and we check for these during our inspection.
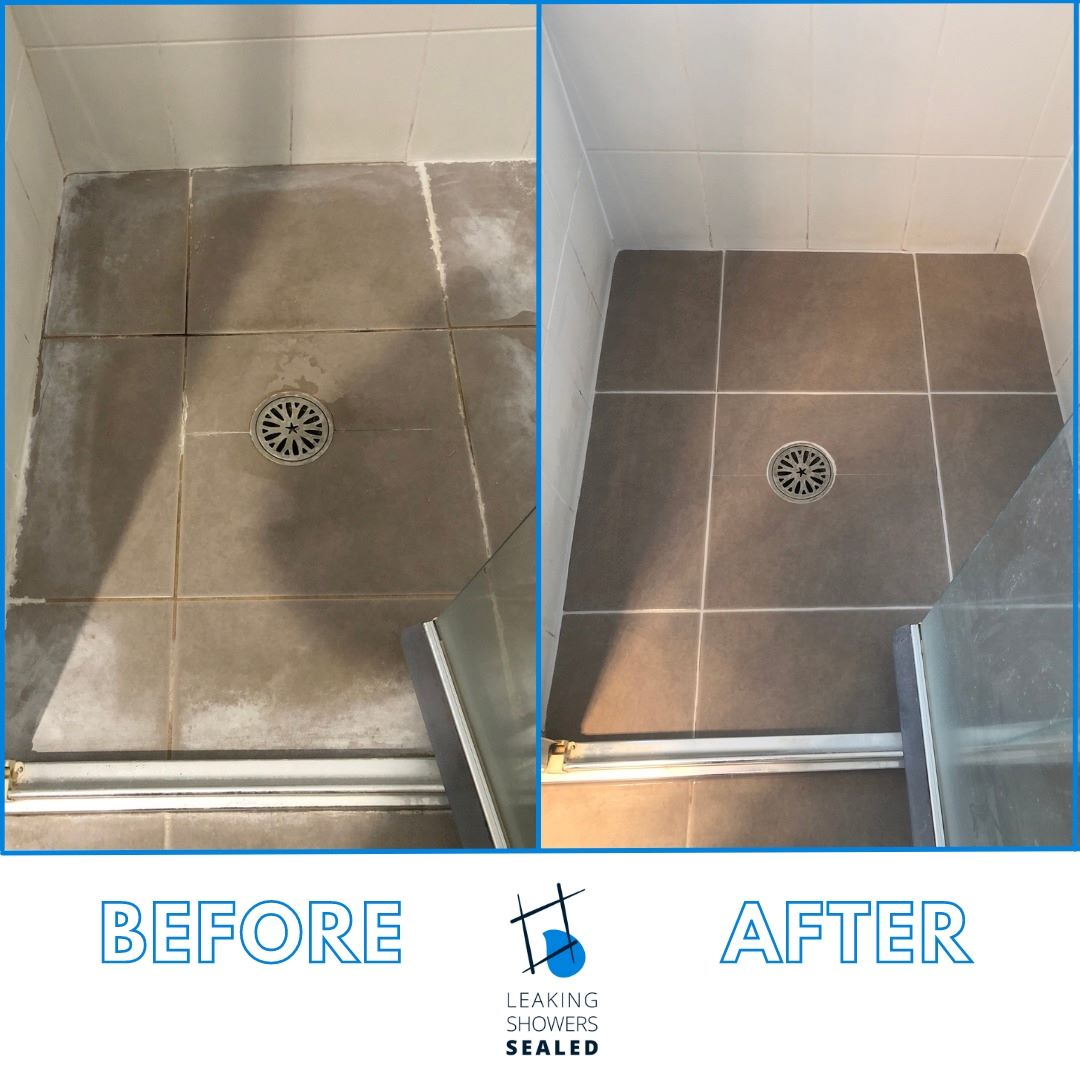
What to Anticipate During the Regrouting Process with Leaking Showers Sealed
The regrouting process at Leaking Showers Sealed comprises five essential steps, ensuring that your tiles remain undisturbed throughout.
Step 1: Inspecting the Shower and Identifying the Leak
We conduct a thorough examination of the grout, silicone, tiles, and surrounding areas to determine where water is escaping. If our inspection indicates a problem with a pipe, drain, or tap, we will inform you before scheduling any regrouting.
Step 2: Removing Old Grout and Silicone
We carefully cut out the old grout and remove all existing silicone, including any layers applied over previous silicone. New grout cannot bond effectively to old grout, making it vital to start with a clean slate.
Step 3: Thoroughly Cleaning the Tiles and Exposed Joints
We ensure the tiles and empty joints are meticulously cleaned to eliminate soap scum, dust, and mould, guaranteeing that the new grout adheres effectively to a pristine surface.
Step 4: Applying Epoxy Grout to Regrout the Shower
We fill the joints with Ardex EG15 epoxy grout. For a shower base seal, we regrout the shower floor, the floor-to-wall junction, and the perimeter. For a complete shower seal, we also regrout every wall grout line.
Step 5: Resealing Corners, Junctions, and Tap Flanges
We apply Ardex ST neutral cure silicone to reseal internal corners and junctions. For a comprehensive shower seal, we ensure the tap flanges are also sealed.
Typically, a shower base seal takes approximately 3 to 4 hours to complete, while a full shower seal for both walls and floor generally requires 4 to 5 hours. You must wait at least 24 hours before using the shower again to allow the grout and silicone to cure properly.
Can Regrouting Eliminate Shower Mould?
Regrouting effectively removes mould that has infiltrated the grout, as the mouldy grout is replaced. Surface cleaning with bleach or mould sprays only addresses the top layer, allowing mould to return since it resides within the grout where water gets trapped. For further information on why shower grout becomes stained and damaged, please refer to our guide.
Can Regrouting Help You Avoid a Complete Bathroom Renovation?
For many homeowners, regrouting provides a practical solution to postpone or avoid a complete bathroom renovation. If the tiles are in good condition and the leak can be traced to the grout and silicone, a regrout and reseal will restore the shower’s watertight integrity. This approach also affords you additional time to save for a future renovation.
A regrout, reseal, and thorough clean can also serve as an effective refresh before listing a home for sale or for landlords between tenant occupancies. Our article on regrouting a shower as a cost-effective renovation demonstrates how significantly a regrout can enhance a bathroom’s appearance.
Is DIY Regrouting a Shower a Viable Option?
While DIY grout kits are widely available at hardware stores, regrouting a shower properly is more complex than it appears. Without the right tools and expertise, you risk:
- Damaging or cracking tiles during the removal of old grout
- Leaving remnants of old grout in the joints, which prevents proper bonding of new grout
- Overlooking silicone joints, which are common sources of leaks
- Failing to identify a leak from a pipe or a compromised membrane
If you are unsure about the source of the water, it is advisable to have the shower inspected before purchasing a DIY kit.
What Is the Cost of Shower Regrouting?
The cost of regrouting a shower varies based on several factors:
- Tile size, as smaller mosaics and 100mm tiles have more grout lines compared to larger 300mm or 600mm tiles
- The dimensions and layout of the shower, including features such as double showers, niches, and additional corners
- The condition of the grout and silicone, including issues like extensive mould, silicone layered over old silicone, or previous repairs needing removal
- Drummy or loose tiles that require refixing prior to resealing the shower
Regrouting is significantly more cost-effective than a complete bathroom renovation or retiling. For a cost estimate, please send photos of the shower floor, walls, and the complete shower to sales@leakingshowerssealed.com.au, or call 1300 815 512.
Common Questions About Shower Regrouting
How long does it take to regrout a shower?
A shower base seal typically requires about 3 to 4 hours on site, while a complete shower seal for both walls and floor takes around 4 to 5 hours. Please allow at least 24 hours before using the shower again.
Will regrouting stop a leak?
Yes, if the leak is due to damaged grout or silicone. Regrouting will not resolve leaks from a pipe, drain, or tap, which require a plumber, nor will it address a failed membrane, which necessitates tile removal.
How often should a shower be regrouted?
The frequency of regrouting depends on the type of grout used, the bathroom’s ventilation, and cleaning practices. Signs indicating the need for regrouting include cracked grout, recurring mould, and persistent damp odours. Our article on how long shower regrouting lasts explains the factors that influence this.
Can you apply new grout over old grout?
No. New grout applied over existing grout will not bond properly and will not fix the leak. It is essential to remove all old grout before regrouting the shower.
Is regrouting covered by warranty?
Yes. A regrout and reseal includes a 10-year warranty on Ardex products and a 7-year workmanship warranty from Leaking Showers Sealed, contingent upon a site assessment.
Contact Us Today
1300 815 512
Why Trust Leaking Showers Sealed for Your Shower Regrouting?
- Since 2016, we have specialised in regrouting and resealing showers without removing tiles.
- We utilise Ardex EG15 epoxy grout and Ardex ST neutral cure silicone for exceptional results.
- Every regrout and reseal is backed by a 10-year warranty on Ardex products and a 7-year workmanship warranty, subject to site assessment.
- We boast over 300 Google reviews across our three locations.
- Our services encompass regrouting and resealing showers throughout North Richmond, the Hills District, and the North Shore of Sydney.
If your shower is leaking, do not hesitate to address the potential damage occurring behind the tiles. Send us photos of your shower or contact us to arrange an inspection. We will evaluate whether a regrout and reseal can effectively stop the leak.
Call Us Today
1300 815 512
Original Article First Published At: Regrouting a Shower to Fix Leaks: When a Regrout Stops the Leak and What to Expect from Leaking Showers Sealed
The Article: Regrouting a Shower: Stop Leaks and What to Expect first appeared on https://writebuff.com
The post Regrouting a Shower: Prevent Leaks and What to Anticipate appeared first on Limits Of Strategy.
The Article Regrouting a Shower: Tips to Prevent Leaks and Expectations found first on https://electroquench.com